
If you’re anything like me, you’ve probably looked at your dog’s store-bought treats and wondered, “What’s actually in these?” That’s what got me into making homemade dog treats in the first place—and let me tell you, it’s way easier (and more fun) than I expected.
These Pumpkin Applesauce Dog Treats are one of my go-to recipes. They’re simple to whip up, full of good-for-them ingredients, and my dog goes absolutely nuts for them.
Whether you’re baking for a special occasion or just want to treat your pup to something wholesome, this one’s a winner.
Benefits of Pumpkin and Applesauce for Dogs
Pumpkin is rich in fiber, which aids digestion and is also loaded with vitamins A, C, and E. It helps with maintaining a healthy immune system and promotes good vision.
Applesauce, especially unsweetened, provides essential vitamins and antioxidants without adding unnecessary sugars. Combining these two ingredients results in a delicious treat that supports your dog’s overall health.
Homemade Pumpkin Applesauce Dog Treat Recipe
Ingredients
Here’s the lineup for these tail-wagging treats:
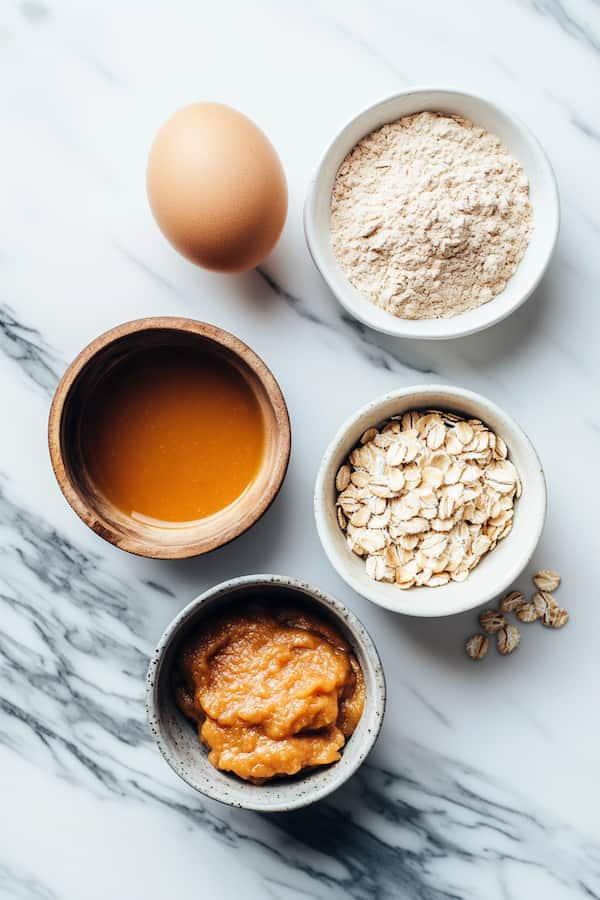
- Pumpkin Puree: ½ cup (100% pure pumpkin, not that pie filling nonsense).
- Unsweetened Applesauce: ⅓ cup (check it’s just apples, no sugar or weird stuff).
- Whole Wheat Flour: 3 cups (swap for rice flour or oat flour if your pup’s got wheat issues).
- Rolled Oats: ¼ cup for that extra chew.
- Egg: 1, to hold it all together.
- Ground Cinnamon: ⅓ teaspoon (optional, for a cozy kick—skip if your dog’s not into it).
Equipment
- Mixing Bowl: Big enough to get messy.
- Baking Sheet: Line it with parchment paper or a silicone mat.
- Rolling Pin: For flattening that dough.
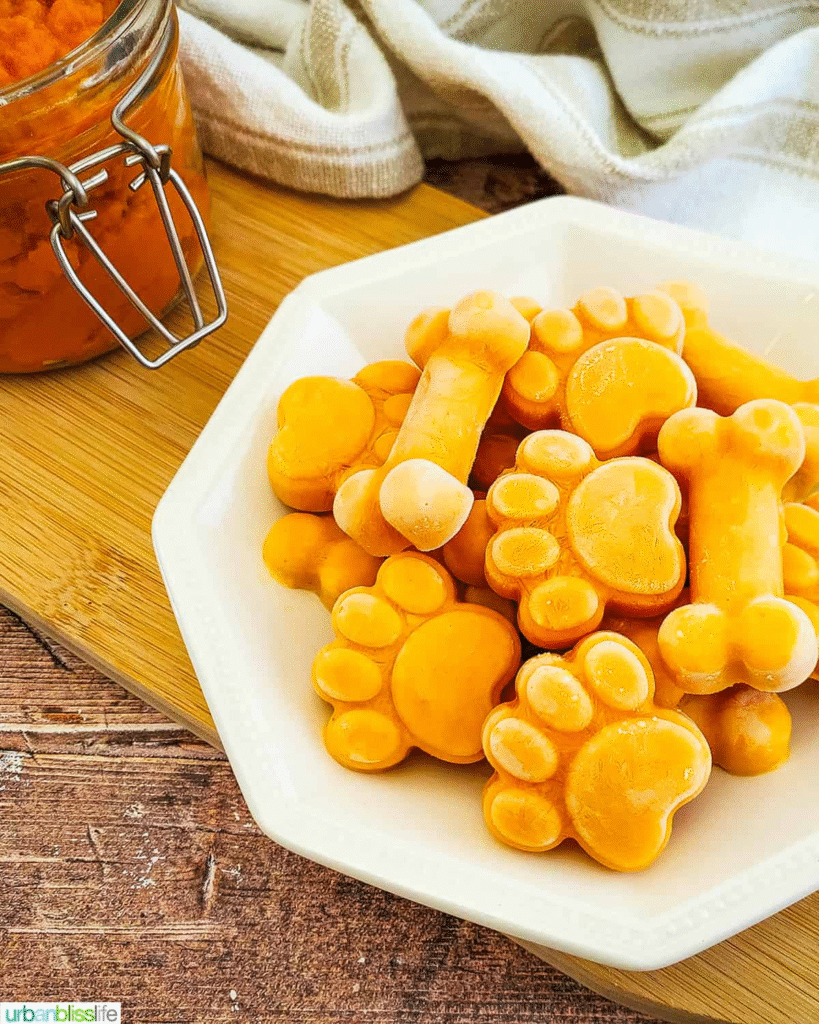
- Cookie Cutters: Bone shapes are peak dog vibes, but any shape works.
- Measuring Cups and Spoons: No guesswork here.
- Wire Rack: For cooling like a pro.
Instructions
Step 1: Crank the Oven
Set your oven to 350°F (175°C). Line your baking sheet with parchment paper or a silicone mat so nothing sticks. Easy cleanup, major win.
Step 2: Mix the Wet Stuff
In a big bowl, toss in the ½ cup pumpkin puree, ⅓ cup applesauce, and 1 egg. Stir it up with a spoon or whisk until it’s smooth and looking like a fall smoothie. Smells good already, right?
Step 3: Add the Dry Goods
Slowly mix in the 3 cups whole wheat flour, ¼ cup rolled oats, and ⅓ teaspoon cinnamon (if you’re using it). Stir until it starts forming a dough. If it’s crumbly and acting stubborn, add applesauce, ¼ cup at a time, until it’s soft but not sticky.
Step 4: Roll It Out
Sprinkle a little flour on a clean counter to keep things from sticking. Grab your dough, plop it down, and roll it out with a rolling pin to about ¼ inch thick. Too thin, and they’ll burn; too thick, and they’ll be chewy instead of crunchy.
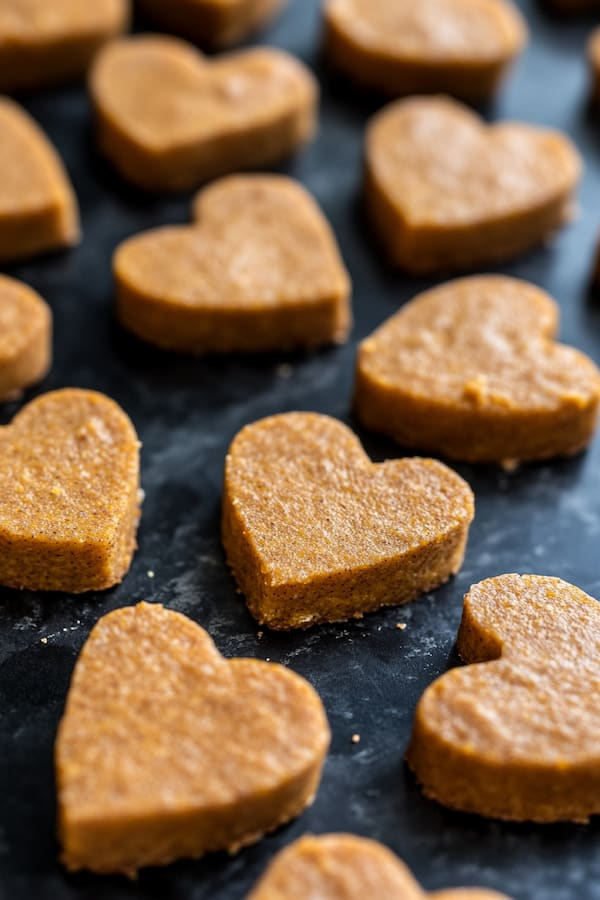
Step 5: Cut Some Shapes
Bust out those cookie cutters and go to town. Bone shapes scream “dog treat goals,” but hearts, stars, or circles work too. Cut as many as you can, then squish the scraps together, roll again, and keep cutting till you’ve used it all.
Step 6: Bake ‘Em
Lay your dough shapes on the baking sheet, leaving a tiny bit of space between each one (they won’t spread much). Pop them in the oven for 25-30 minutes, until they’re golden brown and feel firm when you poke ‘em. Your kitchen’s gonna smell like a doggy bakery.
Step 7: Cool Down
Pull the treats out and let them chill on a wire rack until they’re completely cool. No sneaking them to your pup early—they gotta set! Once cool, they’re ready for that first excited chomp.
Tips and Variations
- Storage: These treats can be stored in an airtight container at room temperature for up to a week. For longer storage, keep them in the refrigerator or freeze them for up to 3 months.
- Customization: Feel free to add other dog-friendly ingredients such as peanut butter (make sure it’s xylitol-free), shredded carrots, or mashed banana for added flavor and nutrients.
- Texture: If your dog prefers a crunchier treat, leave the treats in the oven to cool after turning off the heat. This will dehydrate them further, making them extra crispy.
Recipe Card:
Homemade Pumpkin Applesauce Dog Treats
Ingredients
Equipment
Method
- Step 1: Crank the OvenSet your oven to 350°F (175°C). Line your baking sheet with parchment paper or a silicone mat so nothing sticks. Easy cleanup, major win.
- Step 2: Mix the Wet Stuff.In a big bowl, toss in the ½ cup pumpkin puree, ⅓ cup applesauce, and 1 egg. Stir it up with a spoon or whisk until it’s smooth and looking like a fall smoothie. Smells good already, right?
- Step 3: Add the Dry Goods.Slowly mix in the 3 cups whole wheat flour, ¼ cup rolled oats, and ⅓ teaspoon cinnamon (if you’re using it). Stir until it starts forming a dough. If it’s crumbly and acting stubborn, add applesauce, ¼ cup at a time, until it’s soft but not sticky.
- Step 4: Roll It Out.Sprinkle a little flour on a clean counter to keep things from sticking. Grab your dough, plop it down, and roll it out with a rolling pin to about ¼ inch thick. Too thin, and they’ll burn; too thick, and they’ll be chewy instead of crunchy.
- Step 5: Cut Some Shapes.Bust out those cookie cutters and go to town. Bone shapes scream “dog treat goals,” but hearts, stars, or circles work too. Cut as many as you can, then squish the scraps together, roll again, and keep cutting till you’ve used it all.
- Step 6: Bake ‘Em.Lay your dough shapes on the baking sheet, leaving a tiny bit of space between each one (they won’t spread much). Pop them in the oven for 25-30 minutes, until they’re golden brown and feel firm when you poke ‘em. Your kitchen’s gonna smell like a doggy bakery.
- Step 7: Cool Down.Pull the treats out and let them chill on a wire rack until they’re completely cool. No sneaking them to your pup early—they gotta set! Once cool, they’re ready for that first excited chomp.
Notes
Customization: Feel free to add other dog-friendly ingredients such as peanut butter (make sure it’s xylitol-free), shredded carrots, or mashed banana for added flavor and nutrients.
Texture: If your dog prefers a crunchier treat, leave the treats in the oven to cool after turning off the heat. This will dehydrate them further, making them extra crispy.

Hey there! I’m Steffan, the food lover and creator behind Biteblis.com. Thank you for stopping by! I hope you’ll explore, get inspired, and find something delicious to cook up at home. My mission is simple: to spread joy through food, one tasty bite at a time. For more info, visit About Us.