
There’s something truly special about baking a pumpkin pie from scratch. From the buttery, flaky crust to the spiced, creamy filling, this classic dessert captures the essence of fall in every slice.
While store-bought pies are convenient, nothing compares to the satisfaction of creating one with your own hands. The aroma of cinnamon, ginger, and cloves filling the kitchen is an experience that feels like autumn itself.
This recipe proves that homemade pumpkin pie doesn’t need to be complicated. With a handful of simple ingredients and a few easy-to-follow steps, you can bake a pie that looks and tastes like it came straight out of a bakery.
My Opinion
Every time I make this pumpkin pie, I’m reminded of why homemade always beats store-bought. The crust turns out wonderfully flaky and buttery, and the filling is rich, creamy, and perfectly spiced. I especially love how the spices warm the whole kitchen as the pie bakes — it feels like comfort in dessert form.
I’ll admit, the first time I made it from scratch, I was a little nervous about the crust. But once I chilled the dough and rolled it out carefully, it came together beautifully. The filling was even easier — just a matter of stirring everything together until smooth.
When I finally sliced into the pie after cooling, the texture was perfect and the flavor was even better. My family couldn’t get enough, and it’s now one of those recipes I’ll return to again and again, especially during the holiday season.
Why You’ll Love This Recipe
- ✅ Rich, creamy filling that’s perfectly spiced with cinnamon, ginger, and cloves.
- ✅ A homemade crust that’s buttery, flaky, and miles better than store-bought.
- ✅ Simple ingredients you likely already have in your pantry.
- ✅ Easy step-by-step process, even for beginner bakers.
- ✅ Perfect for Thanksgiving, fall gatherings, or anytime you want a cozy dessert.
Tools You’ll Need
- Mixing bowls (one large, one medium)
- Whisk and spatula
- Pastry cutter or fork (for cutting butter into the flour)
- Rolling pin
- 9-inch pie dish
- Measuring cups and spoons
- Wire rack (for cooling)
Ingredients
For the Crust
- 1 ¼ cups all-purpose flour
- 1 tablespoon sugar
- ½ teaspoon salt
- ½ cup unsalted butter, cubed and chilled
- 3–4 tablespoons ice water
For the Filling
- 1 can (15 ounces) pumpkin purée (not pumpkin pie mix)
- ¾ cup sugar
- ½ teaspoon salt
- 1 teaspoon ground cinnamon
- ½ teaspoon ground ginger
- ¼ teaspoon ground cloves
- 2 large eggs
- 1 can (12 ounces) evaporated milk
Instructions
Step 1: Make the Crust
- In a large mixing bowl, whisk together the flour, sugar, and salt.
- Add the cold, cubed butter and cut it into the flour using a pastry cutter or fork until the mixture resembles coarse crumbs with pea-sized bits of butter.
- Slowly drizzle in 3 tablespoons of ice water, stirring gently with a fork. If the dough still seems dry, add more water a teaspoon at a time until it just holds together when pressed.
- Gather the dough into a disc, wrap tightly in plastic wrap, and refrigerate for at least 30 minutes. Chilling ensures the crust stays flaky and prevents shrinking in the oven.
Step 2: Roll Out the Dough
- Once chilled, lightly flour your work surface and rolling pin.
- Roll the dough evenly into a circle about ⅛ inch thick and large enough to fit a 9-inch pie dish.
- Carefully roll the dough onto your rolling pin, then unroll it over the pie dish.
- Gently press it into the bottom and sides, trimming off any excess around the edges. Crimp the edges with your fingers or a fork for a decorative finish.
- Place the prepared crust back into the refrigerator while you prepare the filling.
Step 3: Prepare the Filling
- In a medium bowl, whisk together sugar, salt, cinnamon, ginger, and cloves until well combined.
- Stir in the pumpkin purée, followed by the eggs. Mix until smooth.
- Gradually whisk in the evaporated milk until the filling is creamy and fully combined.
Step 4: Assemble the Pie
- Preheat the oven to 425°F (220°C).
- Pour the pumpkin filling into the prepared crust, spreading evenly to the edges.
Step 5: Bake the Pie
- Bake at 425°F for 15 minutes.
- Reduce the oven temperature to 350°F (175°C) and continue baking for 40–50 minutes, or until a knife inserted into the center comes out clean. The center should have a slight jiggle, but it will set as the pie cools.
Step 6: Cool and Serve
- Transfer the pie to a wire rack and let it cool completely for at least 2 hours.
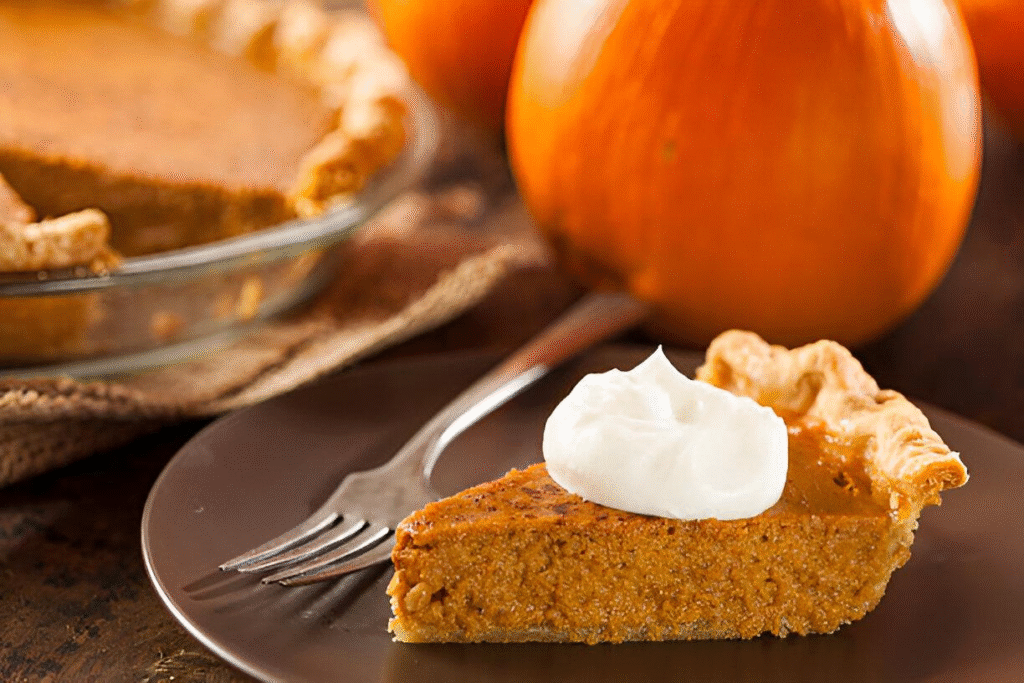
- Once cooled, slice and serve plain or with a generous dollop of whipped cream.
Tips for Success
- Use cold butter for the crust to achieve maximum flakiness.
- Don’t skip chilling the dough — it prevents shrinking during baking.
- Avoid overmixing the filling, which can cause cracks as it bakes.
- Always allow the pie to cool completely before slicing so the filling sets properly.
Variations & Make It Your Own
- Add a pinch of nutmeg to the filling for extra warmth.
- Swap evaporated milk for coconut milk to make a dairy-free version.
- Sprinkle coarse sugar on the crust edges before baking for added texture.
- For a spicier pie, increase the cinnamon or ginger slightly.
Troubleshooting
Crust Issues:
- If the dough is too dry, add water slowly (a teaspoon at a time).
- If the crust shrinks, it likely wasn’t chilled long enough.
Filling Issues:
- If cracks appear, the pie was overbaked. Remove it once the center is just set with a slight jiggle.
- If the filling seems too soft, let the pie cool completely before slicing.
Storing & Freezing
- Store leftovers in the refrigerator, covered with plastic wrap or foil, for up to 4 days.
- Freeze tightly wrapped slices for up to 1 month. Thaw overnight in the fridge before serving.
Conclusion
Making pumpkin pie from scratch may take a little extra effort, but the payoff is worth every step. The combination of a homemade flaky crust and a spiced, creamy filling creates a dessert that’s comforting, flavorful, and perfect for sharing.
Whether you serve it at Thanksgiving or on a cozy fall evening, this pie is sure to become a tradition in your kitchen.

Hey there! I’m Steffan, the food lover and creator behind Biteblis.com. Thank you for stopping by! I hope you’ll explore, get inspired, and find something delicious to cook up at home. My mission is simple: to spread joy through food, one tasty bite at a time. For more info, visit About Us.