
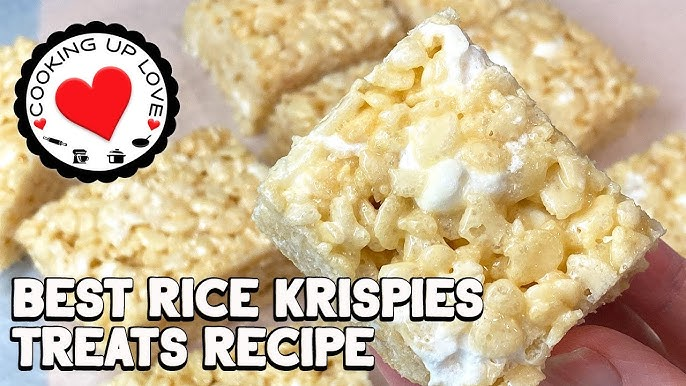
There’s something magical about the sweet, buttery crunch of classic Rice Krispie treats.
This version takes the nostalgic childhood favorite up a notch with lightly browned butter and extra marshmallows for the perfect chewy-meets-crispy texture.
Each bite bursts with that golden, toasty marshmallow flavor balanced by a hint of salt — a simple yet irresistible treat that’s as fun to make as it is to eat.
My Opinion
I’ve made Rice Krispie treats countless times, but this recipe truly changed the game for me. The moment I started browning the butter, my kitchen filled with a warm, nutty aroma that hinted at just how flavorful these were going to be.
Once mixed with the marshmallows, the butter added a subtle richness that made these bars feel a bit more grown-up — yet still every bit as nostalgic as the ones I remember from childhood.
I especially love the texture of these treats: soft, chewy, and just the right amount of crunch. They hold together perfectly without being dense or hard.
The trick of reserving a small handful of mini marshmallows to stir in at the end gives those delightful pockets of gooeyness that make every square feel indulgent. I’ve made these for friends and family, and they disappear within minutes — no exaggeration.
Why You’ll Love This Recipe
- ✅ Perfectly Chewy & Crunchy: The ideal balance of marshmallow softness and crispy rice crunch.
- ✅ Browned Butter Flavor: Adds a delicious nutty depth that elevates the classic recipe.
- ✅ Not Overly Sweet: The balance of butter, vanilla, and salt keeps the sweetness just right.
- ✅ Quick & Easy: Ready in under 30 minutes (plus cooling).
- ✅ Crowd-Pleaser: Perfect for parties, school events, or a nostalgic afternoon snack.
- ✅ Customizable: Add chocolate chips, peanut butter, or sprinkles for fun twists.
Tools You’ll Need
- Large pot or deep saucepan
- Silicone spatula or wooden spoon
- Measuring cups and spoons
- 9×13-inch baking pan
- Parchment paper or plastic wrap (for lining and pressing)
- Sharp knife (for slicing)
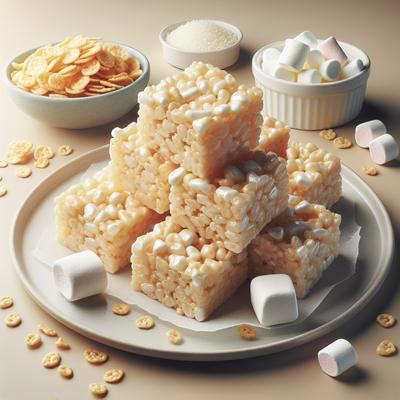
Ingredients
- ¾ cup (170 g) unsalted butter
- 8½ cups (450 g) mini marshmallows — divided (7½ cups + 1 cup)
- 1 teaspoon vanilla extract
- ½ teaspoon salt
- 7½ cups (200 g) Rice Krispies or any crispy rice cereal
(For best results, use gram measurements for accuracy.)
Instructions
- Prepare Your Pan
Lightly grease a 9×13-inch baking pan and line it with parchment paper, leaving a bit of overhang on the sides to help lift the treats later. Set aside. - Brown the Butter
Place your butter in a large pot over medium-low heat. Allow it to melt completely, then continue cooking as it begins to foam and sizzle. Watch closely — you’ll notice golden specks forming at the bottom and a nutty aroma filling the air. When the butter turns a light golden-brown color, reduce the heat to low immediately. (If it darkens too quickly, remove it from the heat for a moment to cool.) - Melt the Marshmallows
Add 7½ cups (397 g) of mini marshmallows to the browned butter. Stir continuously with a silicone spatula until the marshmallows are almost completely melted. Be patient and resist the urge to increase the heat — keeping it low ensures the treats stay soft and chewy instead of hard. - Add Flavor
Stir in the vanilla extract and salt until everything is evenly combined and the marshmallows are fully melted into a smooth, glossy mixture. - Fold in the Cereal
Remove the pot from the heat. Immediately pour in the Rice Krispies cereal and fold gently until every piece is evenly coated in the marshmallow mixture. Work quickly before it starts to firm up. - Add Extra Marshmallows
Add the remaining 1 cup (53 g) of mini marshmallows and fold them through gently. These will soften slightly, creating delicious gooey pockets throughout the treats. Avoid overmixing — you want some texture left! - Transfer and Press
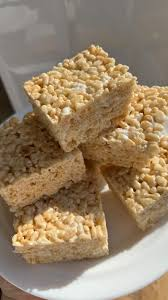
Pour the mixture into your prepared baking pan. Using a piece of parchment paper, wax paper, or plastic wrap as a barrier, lightly press the mixture into an even layer. Don’t press too firmly — a gentle hand keeps the texture soft and chewy. - Cool and Slice
Allow the treats to cool at room temperature for about 1 hour. Once set, lift them from the pan using the parchment overhang. Place on a cutting board and use a sharp knife to cut into even squares. Enjoy immediately!
Storage Tips
- Room Temperature: Store in an airtight container for up to 3 days for the best texture.
- Refrigerator: Can be stored for up to a week, but they’ll firm up. Let them come back to room temperature before serving.
- Freezer: Wrap individually in plastic wrap and store in a freezer-safe bag for up to 2 months. Thaw at room temperature before enjoying.
Variations
- 🍫 Chocolate Chip Rice Krispies: Stir in mini chocolate chips after mixing (allow mixture to cool slightly first).
- 🥜 Peanut Butter Twist: Add 2 tablespoons of peanut butter to the melted marshmallow mixture.
- 🌈 Funfetti Style: Mix in colorful sprinkles before pressing into the pan for a fun party treat.
- 🍪 Cookies & Cream: Fold in crushed Oreo pieces for a creamy crunch.
Frequently Asked Questions
Why did my Rice Krispie treats turn out hard?
This happens when the marshmallows are overheated. Always melt them over low heat to keep them soft and chewy.
Can I use regular marshmallows instead of mini?
Yes, but they take a bit longer to melt. Chop them into smaller pieces for faster, smoother melting.
Do I need to refrigerate them?
Not necessarily. They’re best at room temperature, but if your kitchen is warm, chilling them briefly can help them hold their shape.
Conclusion
These Rice Krispie Treats strike the perfect balance between chewy, gooey, and crispy — everything you love about the classic, elevated with rich browned butter and a touch of salt.
Whether you’re making them for a bake sale, movie night, or just to satisfy a craving, this recipe guarantees nostalgia with every bite.
Category: Dessert, Snack, No-Bake Treats
The Best Rice Krispie Treats Recipe
Ingredients
Equipment
Method
- Prepare Your Pan. Lightly grease a 9×13-inch baking pan and line it with parchment paper, leaving a bit of overhang on the sides to help lift the treats later. Set aside.
- Brown the Butter. Place your butter in a large pot over medium-low heat. Allow it to melt completely, then continue cooking as it begins to foam and sizzle. Watch closely — you’ll notice golden specks forming at the bottom and a nutty aroma filling the air. When the butter turns a light golden-brown color, reduce the heat to low immediately. (If it darkens too quickly, remove it from the heat for a moment to cool.)
- Melt the Marshmallows. Add 7½ cups (397 g) of mini marshmallows to the browned butter. Stir continuously with a silicone spatula until the marshmallows are almost completely melted. Be patient and resist the urge to increase the heat — keeping it low ensures the treats stay soft and chewy instead of hard.
- Add Flavor. Stir in the vanilla extract and salt until everything is evenly combined and the marshmallows are fully melted into a smooth, glossy mixture.
- Fold in the Cereal. Remove the pot from the heat. Immediately pour in the Rice Krispies cereal and fold gently until every piece is evenly coated in the marshmallow mixture. Work quickly before it starts to firm up.
- Add Extra Marshmallows. Add the remaining 1 cup (53 g) of mini marshmallows and fold them through gently. These will soften slightly, creating delicious gooey pockets throughout the treats. Avoid overmixing — you want some texture left!
- Transfer and Press. Pour the mixture into your prepared baking pan. Using a piece of parchment paper, wax paper, or plastic wrap as a barrier, lightly press the mixture into an even layer. Don’t press too firmly — a gentle hand keeps the texture soft and chewy.
- Cool and Slice. Allow the treats to cool at room temperature for about 1 hour. Once set, lift them from the pan using the parchment overhang. Place on a cutting board and use a sharp knife to cut into even squares. Enjoy immediately!
Notes

Hey there! I’m Steffan, the food lover and creator behind Biteblis.com. Thank you for stopping by! I hope you’ll explore, get inspired, and find something delicious to cook up at home. My mission is simple: to spread joy through food, one tasty bite at a time. For more info, visit About Us.